
FOR ENGINEERS
FRP Installation Videos & Webinars
Watch QuakeWrap® products go in: PileMedic® jackets, SPiRe® panels, StifPipe® and InfinitPipe® pipe, wet layup FRP and Form-A-Tube® forms. Recorded webinars with Prof. Mo Ehsani cover design details, test results and lessons from the field.

INSTALLATION TRAINING
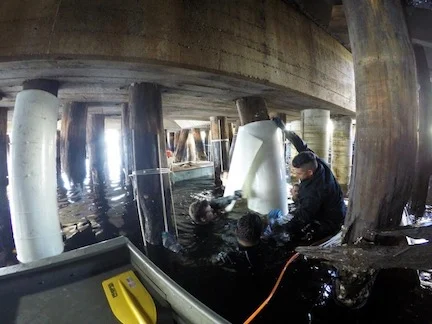
PileMedic® User Manual Video
The video companion to the PileMedic® User Manual issued for the U.S. Army Corps of Engineers Rapid Repair Kit. PileMedic® can be supplied in kits with installation instructions for contractors to follow.
Plays from YouTube
Installation & Project Videos
Showing 39 videos
-
PileMedic® Installation
Posted March 2017 (1 min)
Time-lapse of five localized PileMedic® repairs installed for testing: five piles wrapped in three hours.
Watch on YouTube -
PileMedic® User Manual Video
Posted January 2017 (5 min)
The video companion to the PileMedic® User Manual issued for the U.S. Army Corps of Engineers Rapid Repair Kit for piers, docks and ports.
Watch on YouTube -
Timber Pile Repair Using PileMedic®
Posted October 2018 (1 min)
A badly deteriorated pier along the Virginia coast, restored with PileMedic® pile encapsulation.
Watch on YouTube -
Repair of Submerged Timber Piles with a PileMedic® FRP Jacket
Posted April 2012 (1 min)
Twenty deteriorated timber piles of varying sizes in Port O'Connor, Texas. Long sections of pile were repaired without divers.
Watch on YouTube -
Pile Encapsulation Repair of a Concrete Jetty
Posted April 2020 (3 min)
Concrete pilings under a commercial pier, damaged in a collision, repaired with the PileMedic® FRP encapsulation system.
Watch on YouTube -
Rapid Pile Repair Using PileMedic®
Posted May 2017 (1 min)
Live demonstration at Joint Base Pearl Harbor-Hickam, Hawaii, where U.S. Navy and Army divers showed PileMedic® rapid repair.
Watch on YouTube -
PileMedic® Repairs at the Port of Seattle
Posted November 2017 (1 min)
PileMedic® repairs under the busy Terminal 18 at the Port of Seattle. Video by FRP Construction, LLC.
Watch on YouTube -
Steel Bridge Pile Repair with PileMedic®
Posted September 2017 (3 min)
Indiana DOT uses PileMedic® to strengthen steel piles under its bridges.
Watch on YouTube -
PileMedic® at Kangaroo Point Bridge, Brisbane, Australia
Posted February 2015 (4 min)
Corrosion-damaged concrete columns repaired and strengthened with PileMedic® glass FRP laminate.
Watch on YouTube -
Repair of ASR-Contaminated Concrete Piles in a Crocodile-Infested River
Posted March 2016 (5 min)
Submerged piles in Australia damaged by alkali silica reaction (ASR), repaired with PileMedic® after a 15-year search for a solution.
Watch on YouTube -
PileMedic® for Encapsulation of Underwater Piles
Posted August 2010 (1 min)
Corrosion-damaged concrete piles in water repaired with PileMedic® glass FRP laminates, with no cofferdams.
Watch on YouTube -
Restoration of Structurally Deficient Bridge Piers with PileMedic® Carbon Laminates
Posted September 2010 (3 min)
Corrosion-damaged steel bridge piling in St. Louis repaired with PileMedic® carbon laminates.
Watch on YouTube -
Strengthening Cell Phone Towers with PileMedic®
Posted November 2014 (3 min)
Cell towers that must carry more antennas and heavier loads than their original design, strengthened with PileMedic®.
Watch on YouTube -
Repair of Strong-Beam Weak-Column Frames with FRP
Posted August 2016 (2 min)
Older non-ductile concrete frames with weak columns and strong beams can form plastic hinges in the columns. This patented FRP retrofit adds little to the column footprint.
Watch on YouTube -
SPiRe® FRP Panels Repair a Steel Bulkhead
Posted November 2018 (2 min)
Corroded steel sheet piles and bulkheads repaired with lightweight, corrosion-blocking SPiRe® FRP panels.
Watch on YouTube -
Water Main Point Repair Using SuperLaminate™
Posted November 2019 (2 min)
A no-dig structural point repair for water mains, being adapted for potable water with NSF-61 certified resin.
Watch on YouTube -
PipeMedic® Bridges the Gap in a Pressurized Pipe
Posted August 2010 (1 min)
An engineered FRP laminate bridges a missing pipe section, such as an abandoned drip pot or T-connection, in a remote trenchless operation.
Watch on YouTube -
StifPipe® Repair of a Corroded CMP Culvert, Gillies Range Road, Australia
Posted February 2016 (2 min)
A 72 in. corrugated metal pipe culvert in a remote mountain area near Cairns. The StifPipe® sections were light enough for two workers to push into place by hand.
Watch on YouTube -
StifPipe® Repair of Pressure Pipes at Aguirre Power Plant, Puerto Rico
Posted April 2016 (1 min)
29 deteriorated pipes for the Puerto Rico Electric Power Authority (PREPA), repaired with custom-made StifPipe® that fits snugly inside the host pipe.
Watch on YouTube -
Repair and Construction of Pipelines with InfinitPipe®
Posted April 2016 (4 min)
How InfinitPipe® can build a new pipeline or repair and retrofit corroded or leaking pipes. Narrated by Prof. Mo Ehsani.
Watch on YouTube -
InfinitPipe®: Onsite Manufactured Endless Pipe
Posted October 2014 (3 min)
The mobile manufacturing unit builds 8 in. (200 mm) pipe on site. The pipe shown resists over 500 psi internal pressure. Developed with NSF SBIR Phase I funding.
Watch on YouTube -
Repair of a High-Pressure Gas Pipe Using FRP
Posted July 2016 (3 min)
Remote repair of a high-pressure gas pipe. Trenchless Technology named it Project of the Year (2011).
Watch on YouTube -
Riveted Steel Penstock Repair Using Carbon FRP
Posted May 2020 (3 min)
Rehabilitation of a 120 in. riveted steel penstock inside the near 100-year-old hydroelectric dam at Lake Lure, North Carolina.
Watch on YouTube -
Repair of a Riveted Steel Penstock with Carbon FRP
Posted July 2016 (3 min)
A 90-year-old riveted steel penstock in a hydroelectric plant, repaired with carbon FRP during a scheduled 3-week shutdown.
Watch on YouTube -
Costa Rica Penstock Repair with FRP
Posted July 2016 (2 min)
An 84 in., 1.1-mile concrete penstock at the El Encanto hydroelectric plant, lined from inside with glass FRP through four small openings: 150,000 sq ft of fabric in 15 days.
Watch on YouTube -
Culvert Repair Using Carbon FRP (Time-Lapse)
Posted June 2017 (1 min)
Time-lapse of a crew repairing a culvert with carbon FRP. Courtesy of FRP Construction, LLC.
Watch on YouTube -
External Repair of a Corroded Tank in a Paper Mill with Carbon FRP
Posted May 2013 (1 min)
A corroded chemical tank at a paper mill in Memphis, Tennessee, wrapped externally with QuakeWrap® carbon FRP.
Watch on YouTube -
Blast Retrofit of a U.S. Army Building at Fort Bragg with Carbon FRP
Posted May 2013 (2 min)
Blast hardening of a concrete building with carbon FRP.
Watch on YouTube -
How to QuakeWrap a Building
Posted December 2007 (6 min)
Structural retrofit of a turn-of-the-century brick building with QuakeWrap® FRP products.
Watch on YouTube -
Step-by-Step Guide on How to Repair Piles
Posted April 2023 (3 min)
How to repair a submerged pile in a dock or pier with Form-A-Tube®. The same process applies to piles and columns in other structures.
Watch on YouTube -
Column Formwork and Pile Encapsulation with Form-A-Tube®
Posted April 2020 (2 min)
A pile repair in four simple steps. The strips can be saved and reused on future projects.
Watch on YouTube -
Make Any Length You Want On Site with Form-A-Tube®
Posted August 2020 (1 min)
Standard 4 ft strips are joined with staggered joints to make a tube of virtually any length.
Watch on YouTube -
Form-A-Tube® as a Reusable Mold
Posted August 2020 (1 min)
Six strips make a 12 in. tube for casting concrete posts. Once the concrete hardens, the strips are removed, cleaned and saved.
Watch on YouTube -
Pile Encapsulation (Column Repair) with Form-A-Tube®
Posted August 2020 (1 min)
24 in. steel piles corroded over 12 ft, encased with 14 ft strips that extend 1 ft above and below the corroded zone.
Watch on YouTube -
Encapsulation of Deteriorated Timber Piles with Form-A-Tube®
Posted December 2020 (2 min)
Modular PVC strips snap together to form a tube of any diameter and height around deteriorated timber piles.
Watch on YouTube -
Pile Encapsulation with Form-A-Tube®
Posted April 2020 (4 min)
An introduction to Form-A-Tube® formwork for pile encapsulation, for professional contractors and do-it-yourself users.
Watch on YouTube -
Form-A-Tube®: Reusable Form for Repair of Concrete and Timber Piles
Posted January 2021 (3 min)
Key features of Form-A-Tube® for repair and encapsulation of corroded timber, concrete and steel piles.
Watch on YouTube -
Form-A-Tube®: Adjustable Formwork for Repairing Concrete Columns
Posted May 2020 (2 min)
A reusable plastic form for columns, pedestals or submerged piles: smooth side in to reuse the strips, T-side in for a permanent form.
Watch on YouTube -
Mo Ehsani Discusses the Features of Form-A-Tube®
Posted May 2020 (12 min)
Prof. Mo Ehsani on his background and how he developed Form-A-Tube®.
Watch on YouTube
No videos match these filters.
WET LAYUP IN A PENSTOCK
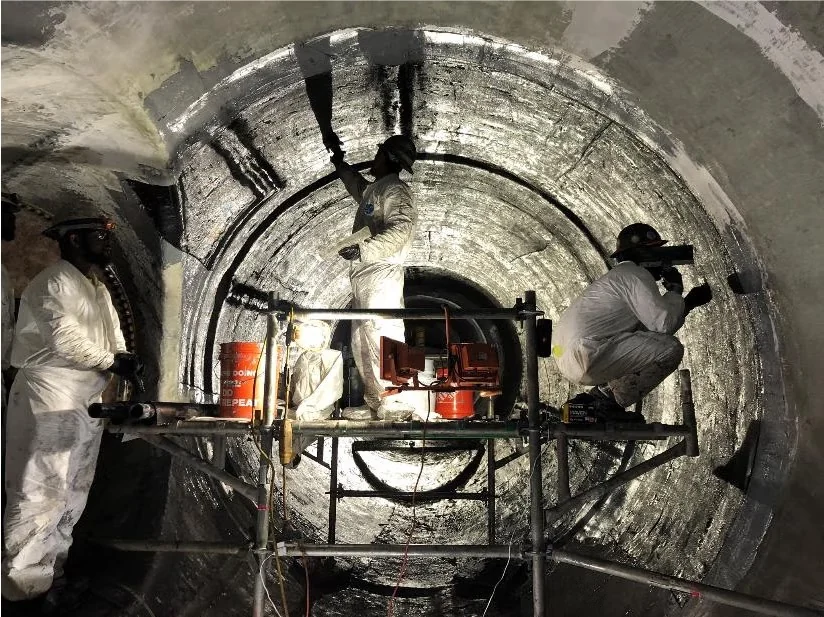
Riveted Steel Penstock Repair Using Carbon FRP
Inside the near 100-year-old hydroelectric dam at Lake Lure, North Carolina, crews rehabilitate a section of 120 in. riveted steel penstock with carbon FRP. The pipe steps down from 120 in. to 96 in. and 48 in., with a 72 in. branch.
Plays from YouTube
INSTALL OVERVIEW
How a Wet Layup FRP Installation Works
The general steps from QuakeWrap®'s installation guide. The exact procedure for your project is set in the project specifications.
-
Prepare the Surface
Loads pass from the FRP into the beam, column or slab through the bond, so the surface must be clean and free of loose paint and dust. This is normally done by sandblasting. Acid washing or other methods may be acceptable in some cases.
-
Fill Voids and Clean
Fill large voids so the surface is fairly smooth, then blow off the remaining dust with pressurized air.
-
Prime
Depending on the substrate (steel, concrete or wood), brush on a layer of primer.
-
Apply the Tack Coat
Mix the two-part tack coat from pre-measured kits and apply it about 40 mils thick where the FRP will go. QuakeBond™ 220TC has a pot life of about 130 minutes at 77°F.
-
Saturate the Fabric
Pour the two-part saturating resin between the rollers of the saturation machine and pass the dry fabric through. It winds onto a take-up reel, and a counter measures the length. Shade the machine on very hot days.
-
Place the Fabric
Unroll the saturated fabric onto the tack coat. Press it by hand or with a porcupine roller to remove bubbles. QuakeBond™ 300SR has a gel time of about 67 minutes at 77°F.
-
Finish the Seams
Overlap the fabric at seams where the project drawings call for it, and finish the overlapping edges carefully with resin.
-
Paint if Required
Paint before a glossy film forms on the surface, usually after about 24 hours. If painting is delayed, lightly scuff the cured FRP so the paint bonds.
WEBINAR REPLAY, MAY 13, 2020
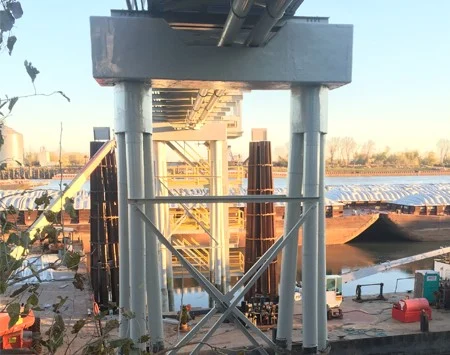
Why Specify PileMedic®?
A recorded QuakeWrap® webinar on specifying PileMedic® for pile repair.
Plays from YouTube
Past Webinars & Presentations
Showing 29 recordings
-
Innovative Solutions for Repair of Piles, Sheet Piles and Bulkheads
Live webinar, April 22, 2020 (94 min)
Replay of the live QuakeWrap® webinar. The slides are in the resources below.
Watch the recording -
Why Specify PileMedic®?
Live webinar, May 13, 2020 (74 min)
Webinar replay on specifying PileMedic® for pile repair.
Watch the recording -
Saving the Decaying Infrastructure with Advanced Composite Materials
2022 Indiana Society of Professional Engineers Conference (54 min)
Prof. Mo Ehsani on carbon and glass FRP for repair of infrastructure.
Watch the recording -
Marine Solutions Presentation by Prof. Mo Ehsani
Posted February 7, 2024 (51 min)
PileMedic® and SPiRe® marine repair solutions, presented to an engineering firm.
Watch the recording -
Aging Infrastructure Presentation by Prof. Mo Ehsani
Posted March 7, 2024 (62 min)
QuakeWrap® FRP solutions for repairing aging infrastructure, presented to an engineering firm.
Watch the recording -
Innovative FRP Solutions for Repair of Infrastructure
Posted June 13, 2025 (59 min)
Recorded lunch and learn: FRP basics, wet layup, PileMedic®, StifPipe®, SPiRe®, SPiRe®+ and ESeaWall™.
Watch the recording -
QuakeWrap® FRP Solutions Presentation
Posted August 27, 2026 (61 min)
An hour-long presentation by Prof. Mo Ehsani covering wet layup, PileMedic®, StifPipe®, SPiRe®, SPiRe®+ and ESeaWall™.
Watch the recording -
S1E1: Using FRP for Pile Repairs
Posted August 8, 2023 (31 min)
Repair of severely corroded steel piles using shear transfer, FRP products for pile repair, grout types and how to choose a repair.
Watch the recording -
S1E2: PileMedic® Products with Josh and Dan
Posted September 15, 2023 (28 min)
Field experience with PileMedic® products, with FRP Construction manager Dan Kennedy.
Watch the recording -
S1E3: Benefits of Hoop Reinforcement
Posted October 11, 2023 (22 min)
How hoop reinforcement can cut time and cost on repair projects.
Watch the recording -
S1E4: ShearWrap™ Applications and Load Transfer
Posted November 6, 2023 (30 min)
The ShearWrap™ application process and load transfer, plus a discussion of corrosion concerns with a transportation research institute in Mexico.
Watch the recording -
S1E5: Seawall Repair Designs Using SPiRe®
Posted December 11, 2023 (26 min)
Prof. Ehsani explains a recent seawall repair design.
Watch the recording -
S2E1: Step-by-Step Repair of Seawalls and Bulkheads with SPiRe®+
Posted January 8, 2024 (51 min)
Step-by-step repair of a corroded seawall or bulkhead: 3 ft wide panels anchored on about a 3 ft by 3 ft grid, with the space behind filled with concrete or grout.
Watch the recording -
S2E3: Materials for Annular Space
Posted March 12, 2024 (30 min)
How to choose a fill material for an annular space, such as the space between a pile jacket and the pile.
Watch the recording -
S2E5: Steel Sheet Pile Repair Job Site Walkthrough
Posted June 7, 2024 (41 min)
A walkthrough of a live steel sheet pile repair job site in Florida.
Watch the recording -
S2E6: Reviewing Your Projects for Faster and Cheaper Solutions
Posted July 13, 2024 (32 min)
Prof. Ehsani reviews projects and the repair he would recommend instead of traditional methods.
Watch the recording -
S2E7: Prof. Mo Visits FL Job Site
Posted August 29, 2024 (21 min)
A job site visit at a condo in Hollywood, Florida, walking through the columns and beams that need repair.
Watch the recording -
S2E8: The Evolution of FRP Repairs with Prof. Mo
Posted October 3, 2024 (23 min)
SPiRe® panels for industrial slab rehabilitation and corrosion protection, with case studies.
Watch the recording -
S2E9: Design for Shear Transfer
Posted November 22, 2024 (34 min)
Design for shear transfer, and the design and engineering challenges of corrosion.
Watch the recording -
S2E10: Following Mo's Travels
Posted December 23, 2024 (28 min)
Visits to QuakeWrap® job sites in North Carolina, Weston, Florida and Nashville, Tennessee.
Watch the recording -
S3E1: Repairing Concrete Columns Live from Job Site
Posted February 19, 2025 (28 min)
Live from a job site repairing damaged concrete columns with carbon fiber, comparing wet layup with the PileMedic® system.
Watch the recording -
S3E2: Steel Pipe Pile Repair and Lessons from Seattle
Posted March 31, 2025 (35 min)
Repair of severely corroded steel pipe piles supporting a major facility in Seattle, restoring load-bearing capacity and flexural strength.
Watch the recording -
S3E3: PileMedic® for Pile Protection: A Single Layer FRP Jacket
Posted April 25, 2025 (32 min)
Single-layer PileMedic® FRP jackets used to protect existing piles from future deterioration.
Watch the recording -
S3E4: Restoring Corroded Concrete Slabs: From Coasts to the Midwest
Posted June 4, 2025 (31 min)
SPiRe®+ repair of corroded prestressed hollow-core slabs at an oceanfront lodge in Pine Knoll Shores, North Carolina.
Watch the recording -
S3E5: Marine Infrastructure Live, July 22
Aired July 22, 2025 (28 min)
Flexural test results for beams or wall panels built with SPiRe®+ at 4, 3 and 2 in. grout thicknesses, and for ungrouted panels on 4 ft spans.
Watch the recording -
S3E6: Innovations in Culvert Rehabilitation: Wet Layup and StifPipe®, Part 1
Posted November 24, 2025 (39 min)
Part 1 covers wet layup FRP and SPiRe®+ for box culverts.
Watch the recording -
Innovations in Culvert Rehab: StifPipe® for Circular Culverts (Part 2)
Posted December 18, 2025 (35 min)
Part 2 covers the StifPipe® CFRP honeycomb liner for deteriorated corrugated metal pipe culverts.
Watch the recording -
Timber Pile Repair: The Benefits of PileMedic® for Marine and Bridge Foundations
Posted March 9, 2026 (35 min)
A field-focused look at timber pile repair with PileMedic®.
Watch the recording -
Epoxy Fill vs. Cementitious Grout: Why Engineers Are Rethinking Timber Pile Repair with PileMedic®
Posted June 18, 2026 (24 min)
A live panel and demonstration on epoxy fill versus cementitious grout inside PileMedic® jackets on timber piles.
Watch the recording
No recordings match these filters.
Do these videos replace the project specifications?
No. The steps and videos on this page are general. The exact installation procedure for a project is part of the project specifications prepared for the engineer of record. Our team can provide QuakeWrap® specifications and sample design details for your engineer.
Can contractors install PileMedic® from a kit?
Yes. PileMedic® can be supplied in kits with installation instructions for contractors to follow. The PileMedic® User Manual Video accompanies the user manual issued for the U.S. Army Corps of Engineers Rapid Repair Kit.
How long does the resin stay workable?
At 77°F, QuakeBond™ 220TC tack coat has a pot life of about 130 minutes and QuakeBond™ 300SR saturating resin a gel time of about 67 minutes. Higher temperatures shorten both, so mix only what can be applied within the pot life and shade the saturation machine on very hot days.
Can an FRP installation be painted?
Yes. Paint before a glossy film forms on the surface, which usually happens after about 24 hours. If painting is delayed, lightly scuff the cured FRP so the paint bonds.
Are the webinar slides available?
Yes, for the April 22, 2020 webinar on repair of piles, sheet piles and bulkheads. The slides are in the resources below.
Can you provide specifications for our engineer?
Yes. Our team will recommend the right QuakeWrap® system and provide product data sheets, specifications and sample design details for your engineer of record.
INSTALLATION QUESTIONS
Installation Videos & Webinars FAQs
 Prof. Mo Ehsani, P.E.Founder, QuakeWrap®
Watched an installation and want the specifications behind it? Tell us about your structure and our team will send the documents your engineer of record needs.
REQUEST SPECIFICATIONS & DESIGN DETAILSPRODUCTS IN THESE VIDEOS
Explore the Products
Planning an FRP Installation?
Tell us about the structure. Our team will recommend the right QuakeWrap® system and provide specifications for your engineer.